Big Life Update!

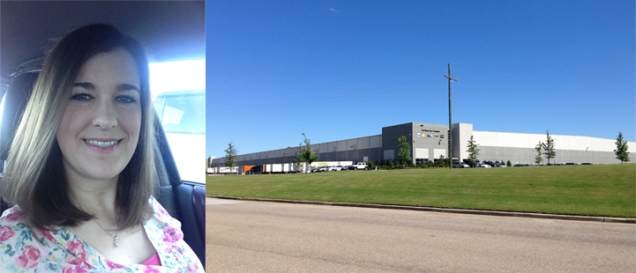
This blog post is overdue! Since the end of May, I am no longer teaching as a lecturer at Mississippi State University. I now work as a Product Development & Design Manager at NBG Home– Nielson Bainbridge Group– in Southaven, MS (20 minutes from Memphis, TN). NBG Home represents a family of home decor companies, and is a global designer and manufacturer of home decor products. There are several branches around the world, spanning lighting, furniture, wall art, fabric, decor accessories, and frames. My branch in Southaven focuses primarily on lamps and furniture! This opportunity will broaden my horizons in art, business, and travel.

So far I have received projects to design lamps for Target, Home Goods, Lowe’s, HomeSense, Marmaxx, and Walmart. It is so much fun! I had an interest in product design throughout my graphic design schooling and absolutely loved 3D assignments, whether it was a sculpture or a creative packaging design project, but never thought I would one day be sending my lighting visions to China and be put into production to share with the world. It is so cool to take a stroll with coworkers through the local Target, Home Goods, and Hobby Lobby, and pointing out all the items on display for sale that my coworkers designed. It will probably be several months before my products will be on shelves, but I will totally be that girl taking selfies with my lamps and furniture in stores once they’re out, haha!

How does this job work? We research future trends in home decor and fashion, and our “customers” (aka store brands like Target) send us project sheets with generalized imagery and explanations of what they’re looking for in style and function. We also must work to meet their price points, as well. If the lamp is meant to sell for $12, it’s not going to look like it should cost $40 in style and materials! I do online research for inspiration, sketch, Photoshop together, and list fabric and finish swatch codes, Pantone colors, and dimensions. I construct my ideas in PowerPoint to present to the customer or send straight to China to receive quotes for production in different factories. I make my choice of factory in accordance to quotes and quality, they get to work, and I receive photo samples to approve of their progress.

I also get to help switch out the items in the large NBG showroom in our building prior to particular customers’ arrival for meetings in choosing products to sell in their stores. Our warehouse is FULL of home decor items, and is a dream to walk through to see sooooooo many lamps and shades in every color, shape, and material you can think of. It is also a perk that I got to choose which items I wanted to put in my office for decoration 🙂

Later this month I will fly to High Point, North Carolina with a few others to help set up for the big High Point Market.

I get to do some solid graphic design work now and then, too, such as the ad and email invitation for the High Point Market.

One day when I’m more settled living and working here, and have EVERYTHING unboxed (HA!) in my cute little house, I want to get back to making my hand-recycled paper and open an Etsy shop. I hope you will stay tuned for what’s to come!

firstday
First day at the new job!

Design I // Stop Motion Animation Final

For Design I’s final project, we focused on time and motion. With technology speeding ahead these days, it is beneficial to challenge students to try this as a school project.

Students had to produce a one-minute stop motion animation consisting of photography and sound. Creativity wise, the sky was the limit! The best video-editing software available to them were Apple iMovie and Windows Movie Maker. The more frames per second that were compiled, the smoother the video appeared. To put this into perspective, the Wallace & Gromit 30-minute shorts were shot close to 20 frames per second, adding up to be around 35,000 shots per video. That’s a bit extreme for my students, so they were encouraged to place at least two frames per second. We also watched short films by Disney and Tim Burton, and the hilarious YouTube classic “Marcel the Shell with Shoes On“.

It was a challenge for students to work on an art project of this scale, especially if they were new to Apple iMovie & Windows Movie Maker video-editing software. However, they were very proud of themselves for figuring out such a feat. We had a lot of fun in both sections eating snacks and watching everyone’s videos, and celebrating the end of another school year!

Below are some examples of what was submitted. So turn up your audio and be entertained by these one-minute shorts!

* I have permission from my students to promote their work on my website.

2 sections:


Intro to Computing // Pen & Pixel

My students’ next Photoshop project was entitled “Pen & Pixel,” in which they had to construct a self portrait. It was a requirement to scan in textures, drawings, paintings, or items they could edit to become a part of the image. Many students demonstrated impressive concepts about themselves. Below are some examples that were turned in. All have aspects to be improved upon for their portfolio, but overall I was very pleased with their results!

* I have permission from my students to promote their work on my website.

Carson-Brantley_Pen-Pixel
by Carson Brantley
Elizabeth_Gammill-Pen&Pixel-Portrait
by Elizabeth Gammill
Grayson-Brown_Pen-and-Pixel
by Grayson Brown
Josephmacgown_pixel_intuitiveexpression
by Joseph Macgown
Julia-Thompson_pen and pixel
by Julia Thompson
Madison-Wigginton_pen-pixel-portrait
by Madison Wigginton
Whitney-White_Self-Portrait
by Whitney White
photoshop this one
by Mary Hannah Ruff

Intro to Computing // Creature Cartoon GIF

As an added continuation of their first Creature Cartoon project done in Adobe Illustrator, I challenged my students to turn it into a GIF after we started learning Photoshop. There are many ways to make a GIF, but in my research I found it was best to form their creature in Illustrator, and pull the file into Photoshop to put it into action.

I posted my own Part I and Part II tutorial YouTube videos demonstrating the steps on my laptop screen so students could reference them outside of class to produce their own GIF.

Students had to implement at least 3 actions in their GIF to receive full credit– for example eyes blinking, arms moving, and feet tapping. The number of frames they incorporated depended on their actions and how many they personally needed to see the actions to smooth completion.

It was so fun seeing these little guys and gals come to life!

Below are some GIFs that were turned in. All have aspects to be improved upon for their portfolio, but overall I was very pleased with their results.

* I have permission from my students to promote their work on my website.

by Carson Brantley: anxious, fly, antlers ^

by Elizabeth Gammill:  crawl, giggly, long tail ^

by Shannon Shepherd: big feet, running, sad ^

by Grayson Brown: mellow, shell, exercise ^

by Whitney White: afraid, mane, sleeping ^

by Madison Wigginton: calm, short legs, smell flower ^

by Mary Hannah Ruff: long arms, upside down, bashful ^

by Caylee Hubbard: squishy cheeks, happy, climbing ^


Design I // Texture

For Design I’s fifth project, we focused on texture. Students collected an assortment of black and white textures including…
found (photography, magazines, books)
rubbed (charcoal rubbing of physical texture on paper)
created (using a range of mediums to invent a texture).

Then they collaged and glued them together into a quilt block pattern of their choice. They had to be precise and mindful of their workmanship. Since they were working with a grid and pattern, slight mistakes would be noticeable.

Below are some of the composition sets that were submitted. All have aspects to be improved upon for their portfolio, but overall I was very pleased with their results!

* I have permission from my students to promote their work on my website.

Section4_Breanna-Rochelle_Texture
by Breanna Rochelle
Section4_Landen-Rucker_Texture
by Landen Rucker
Section4_Lexi-Bennett_Texture
by Lexi Bennett
Section4_Olivia-Lewis_Texture
by Olivia Lewis
Section5_Bess-Reilly_Texture
by Bess Reilly
Section5_Samantha-Marshall_Texture
by Samantha Marshall
Section5_Taylor-Fikes_Texture
by Taylor Fikes
Section5_Wes-Edgeworth_Texture
by Wes Edgeworth
Section5_Willie-Griffin_Texture
by Willie Griffin
Section4_Kaleb-Baker_Texture
by Kaleb Baker

Intro to Computing // Impossible Reality

For my students’ first Photoshop project, I wanted them to think outside the box and create an “Impossible Reality”. They had to gather their original photography and make new photos as needed to compose their surreal image. The main artist of inspiration was Eric Johansson. He is an incredible Photoshop artist, but also kind enough to post photos and videos to demonstrate his entire process, which is great for beginners to see. Like Eric, they needed to produce an image that tricks the eye to appear realistic.

Below are some examples that were turned in. All have aspects to be improved upon for their portfolio, but overall I was very pleased with their results!

* I have permission from my students to promote their work on my website.

Carson-Brantley_impossible-reality
by Carson Brantley
Elizabeth_Gammill-Impossible_Reality
by Elizabeth Gammill
Huner Smith
by Hunter Smith
Jacquelyn_Mullins_Impossible_Reality
by Tori Mullins
Julia-Thompson_impossible-reality
by Julia Thompson
Shannon-Shepherd_Impossible-Reality
by Shannon Shepherd
Whitney-White_impossible-reality-Rgb
by Whitney White

Intermediate Computing for Design // Nature Posters + Blufish Visit

The fourth project for Intermediate Computing for Design class was to create two poster designs for a fictional lecture called “Nature as Design.” One had to be done using Illustrator, and the other using Photoshop and InDesign. The challenge was to design two posters that have a cohesive, complimentary style and will catch the public’s eye. Using different software to create the same effect for different posters also helped inform the students the differences between the programs’ capabilities.

This project was their first project dealing with typography. Students were also required to print their designs on special textural and/or colored paper ordered online. Most students chose to order from Neenah or French. As this was their first time printing on paper other than Epson, they had to make adjustments in relation to image color and contrast.

Below are photographs of posters that were turned in. All have aspects to be improved upon for their portfolio, but overall I was very pleased with their results!

* I have permission from my students to promote their work on my website.

DSC_6282
by Laura Leigh Hicks, cream paper
DSC_6285
by Laura Leigh Hicks, cream paper
DSC_6289
by Connor Booth, white dimpled paper
DSC_6293
by Connor Booth, white dimpled paper
DSC_6297
by Gerald Wicks, cream speckle-toned paper
DSC_6302
by Gerald Wicks, cream speckle-toned paper
DSC_6306
by Bethany Smith, pink speckle-toned paper
DSC_6309
by Bethany Smith, pink speckle-toned paper
DSC_6315
by Kate Webb, silvery pearl paper
DSC_6264b
by Cara Moore, cream linen paper
DSC_6266
by Cara Moore, cream linen paper
DSC_6268
by Carly Bond, cream dimpled paper
DSC_6271
by Carly Bond, cream dimpled paper
DSC_6273
by Trent Furr, green speckle-toned paper
DSC_6276
by Trent Furr, blue speckle-toned paper

Also a big thanks to Blufish design studio in Starkville, MS for allowing my class to tour their firm, learn about their business, what to expect in the workplace outside of school, and ask questions. It was a delightful, informative visit!

IMG_1162

Design I // Value

For Design I’s fourth project, we focused on value. Students chose a photograph, magazine ad, or calendar photo, and were challenged to extract color from their chosen area, leaving only value. They painted 20–25% of the photo with white, black, and grey acrylic paint, following the original values so closely that their painted shape fit seamlessly on top of its unpainted photograph. This challenge was much like a “paint-by-number” activity. If a well-done solution is photographed or Xeroxed in black and white, it should be difficult to distinguish the area painted in greys from the original.

Below are some of the pieces that were submitted. All have aspects to be improved upon for their portfolio, but overall I was very pleased with their results!

* I have permission from my students to promote their work on my website.

Section4_Janae-Shannon_Value
by Janae Shannon
Section4_Kimberly-Kazmark_Value
by Kimberly Kazmark
Section4_Lexi-Bennett_Value
by Lexi Bennett
Section4_Paige-Davis_Value
by Paige Davis
Section5_Samantha-Marshall_Value
by Samantha Marshall
Section5_Laken-Beasley_Value
by Laken Beasley
Section5_Wes-Edgeworth_Value
by Wes Edgeworth